


Introduction

For a while now, I have been using an Arduino Nano and Bluetooth Low Energy (BLE) module to control my RC car BlueCArd, which required separate Android and iOS apps for the control interface. Although this solution worked well, I wanted to explore a more elegant and universal approach using a NodeMCU with a Wi-Fi module. This would allow me to control the car through a browser-based interface on any device, eliminating the need for dedicated apps.
I had been contemplating this idea for some time, but as someone who had never created a web-based solution with NodeMCU before, I knew it would be a challenging task. However, with my recent subscription to ChatGPT Plus and access to the powerful GPT-4 model, I decided to put this AI assistant to the test. My goal was to see how far I could get with the project by providing ChatGPT with instructions and making small tweaks as needed to ensure everything worked smoothly. See a video below of how it works:
You can find the source code on GitHub here: https://github.com/nenovmy/arduino/tree/master/wificar
Choosing the Components and Wiring Setup
First, I consulted ChatGPT-4 about connecting the following components to a NodeMCU V3 board:
- A DC motor to power the car
- A servo motor for steering
- An LED for headlights
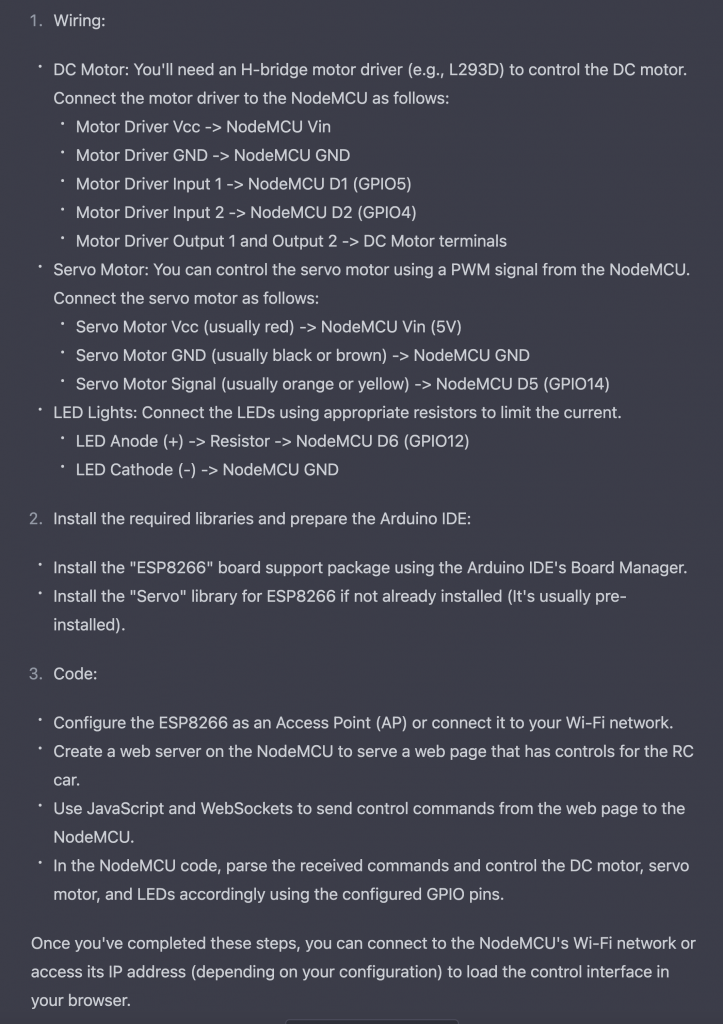
Immediately, ChatGPT-4 provided a possible wiring scheme and even pointed out the need for a motor driver in the setup (refer to the chat transcript below).
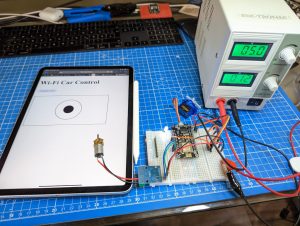
WARNING: This wiring will burn out your NodeMCU! Although it is logically sound, the NodeMCU doesn’t provide enough current to drive a DC motor and a Servo Motor. To use this you need first to connect an external power supply to the VIN and the GND pins! (Fun fact! You can even ask ChatGPT if this warning is true, and it will provide additional information.)
In just a few minutes, I had my circuit connected and ready to go, following the instructions provided by ChatGPT.
Writing the Software
Next, it was time to get some code written, and of course, I let ChatGPT do the heavy lifting! My instructions were simple:
“Ok, the scheme is ready. Now let’s write some code. Please create a sketch that connects to my network (name: <my WiFi name> pass: <my WiFi password>), and start a web server with a page. On this page add a button to turn the LED on and off.”
To my delight, ChatGPT came through with flying colors! The generated program ran flawlessly without any modifications and accomplished exactly what I had asked for. The web server was up and running, and I could easily control the LED with the button on the webpage. It was truly impressive to see how ChatGPT could generate functional code so quickly and efficiently.
The next step was a bit more challenging. I provided the following message to explain my requirements:
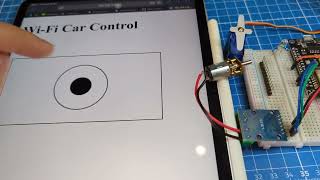
“Ok, great! Now we need to talk about how the motors will be controlled. What I want is to have a canvas component with a circle in the middle (all written in js). I can then move the circle with my thumb: top/bottom moves the car forward and backward, left/right moves the servo motor to steer left/right.”
ChatGPT generated the code but left some functions unimplemented, like this:
javascriptCopy codefunction sendControl(x, y) {
  // Implement sending control commands to the server
}
It also merely explained that I needed to implement a webSocketEvent(...) function in the Arduino code:
cppCopy codevoid webSocketEvent(uint8_t num, WStype_t type, uint8_t * payload, size_t length) {
  if (type == WStype_TEXT) {
    // Parse the received message and control the motors
  }
}
This was helpful, but not exactly what I wanted, as I didn’t want to implement the code myself. So, I asked ChatGPT to generate the complete code for me, based on the initial motor connections it had suggested. And to my amazement, it did just that! The generated code included the necessary webSocketEvent() function and the complete JavaScript code for controlling the motors through the web interface. It was a fantastic demonstration of ChatGPT’s capabilities, as it was able to understand my requirements and generate the code accordingly.
I copied the code into the Arduino sketch, but unfortunately, there was a compile error:
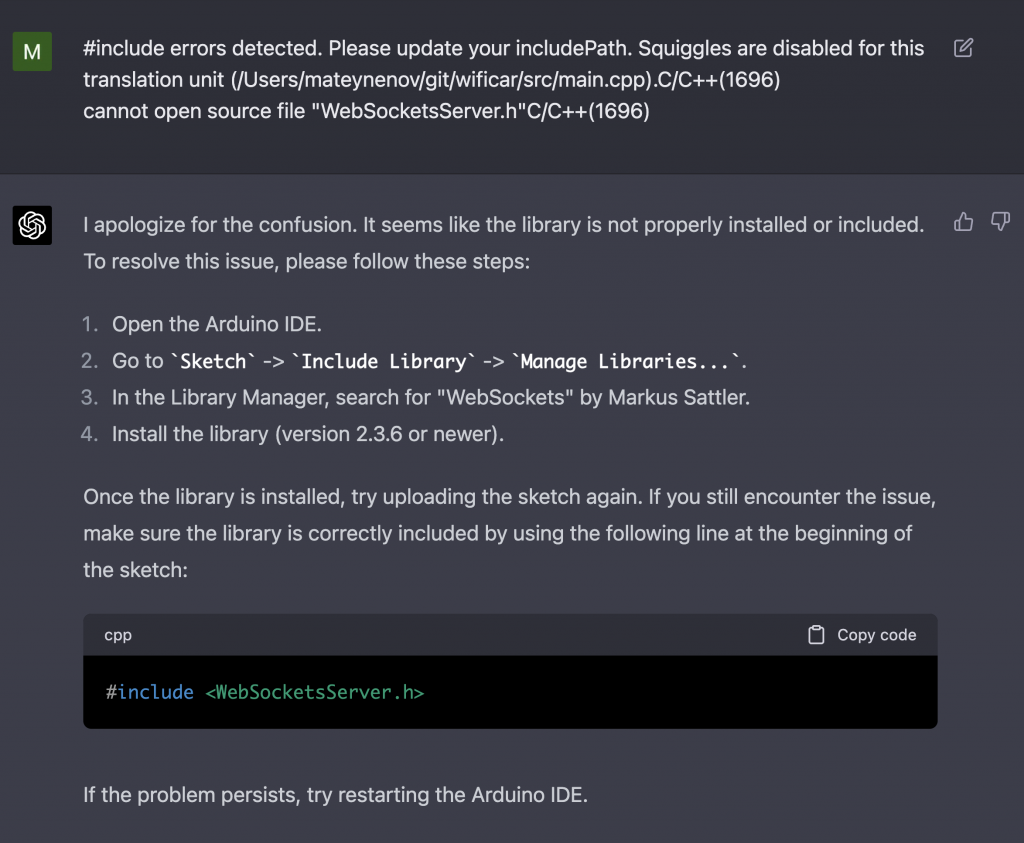
In fact, there were multiple errors like this, but ChatGPT was able to help me fix them quickly every time! Once we resolved the issues, I was able to compile the code and upload it to the NodeMCU, and it worked as expected.
I could see the canvas and the circle as I had envisioned, and I was able to control the motors, albeit with some minor logic errors in the code. These were quite easy to fix, and after making the necessary adjustments, the code ran smoothly!
Conclusion
I was truly amazed at how quickly I was able to create a working program that even included a graphical input controller (the JavaScript canvas), all with the help of ChatGPT. This powerful AI tool made it possible to create a complex project in a fraction of the time it would have taken me to do it on my own.
In conclusion, it seems that the NodeMCU isn’t as responsive as desired when controlled through a web interface, even when utilizing WebSockets. A potential solution to improve performance might be to use UDP, but this would require writing separate apps for each platform. As a result, for the time being, I’ll stick with the Arduino Nano and BLE approach, which has proven to be reliable and responsive for my RC car project. Nonetheless, this experiment with ChatGPT 4 and NodeMCU has been a valuable learning experience and has expanded my knowledge of possible solutions for future projects.
Find the source code on GitHub here: https://github.com/nenovmy/arduino/tree/master/wificar


Leave a Reply
You must be logged in to post a comment.