


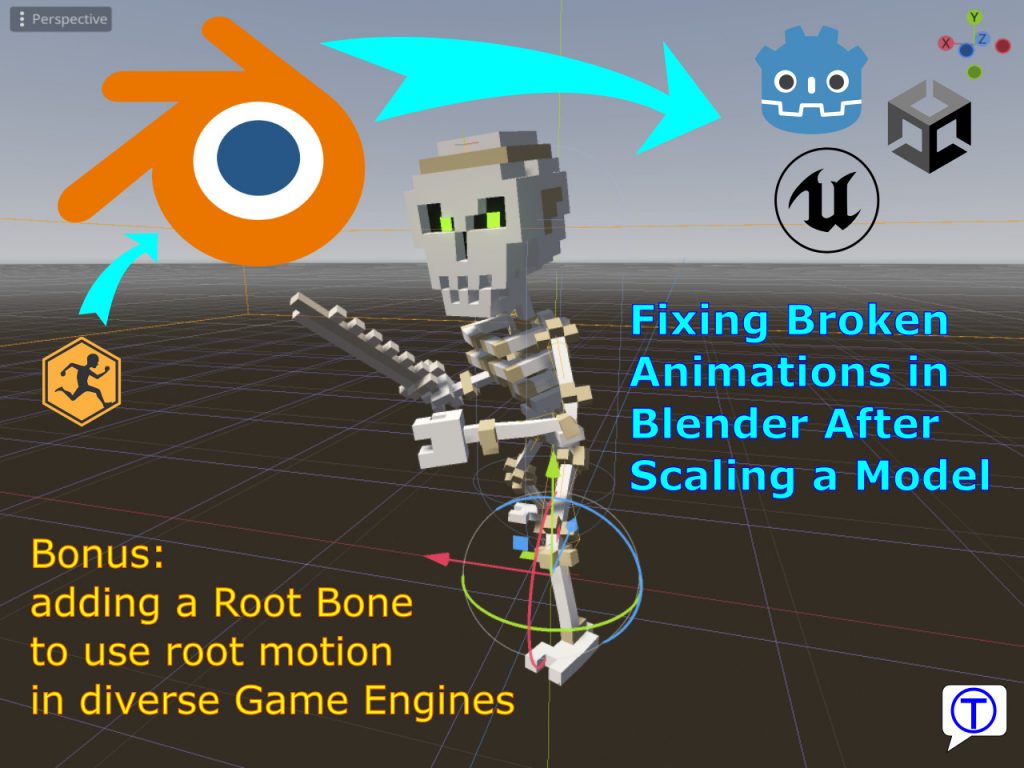
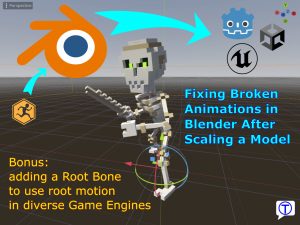
Hello tech enthusiasts and fellow game developers! Today, we’re diving into a common dilemma many face when working with animated models in Blender, especially those coming from Mixamo. Whether you’ve faced this scaling problem before or are simply looking to expand your Blender troubleshooting toolkit, this guide, complete with screenshots, is tailor-made for you.
I also created a video tutorial, you can watch it here:
Background:
When animating 3D models using Mixamo, an essential point to remember is that only one of the animations should include the skin. All subsequent animations should be skinless.
These animated models are typically exported in FBX format. For the Godot engine aficionados among us, the next step is converting these FBX files into GLB format. Blender is our ally in this process, assisting us in merging all animations into one cohesive file.
Additionally, a quick note for those implementing root motion: It’s usually advantageous to have a distinct root bone. This can be seamlessly integrated with a particular Blender plugin (see it on GitHub).
The Scaling Problem:
Blender and FBX sometimes don’t play nice. Importing an FBX into Blender often results in the model being scaled down by a factor of 100. When we try to rectify this by scaling it back up, it wreaks havoc on our animations. However, it’s crucial to note that this scaling impacts only the locations. Bone rotations and other transformations remain unaffected!
The Solution:
Let’s tackle this issue methodically:
1. Importing and Adjusting with the Root Bone Plugin:
Editing and Installing the Root Bone Plugin
- Download the Plugin: First, download the zip file of the plugin from Github.
- Unzipping the File: After downloading, unzip the file in a separate folder. Once unzipped, navigate to it and open the file named
mixamoroot.py.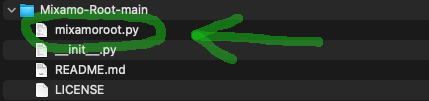
- Locate the Relevant Line: In the
mixamoroot.pyfile, search for the line “root_bone.tail.y = 30”. These line should look similar to what’s shown in the provided screenshot.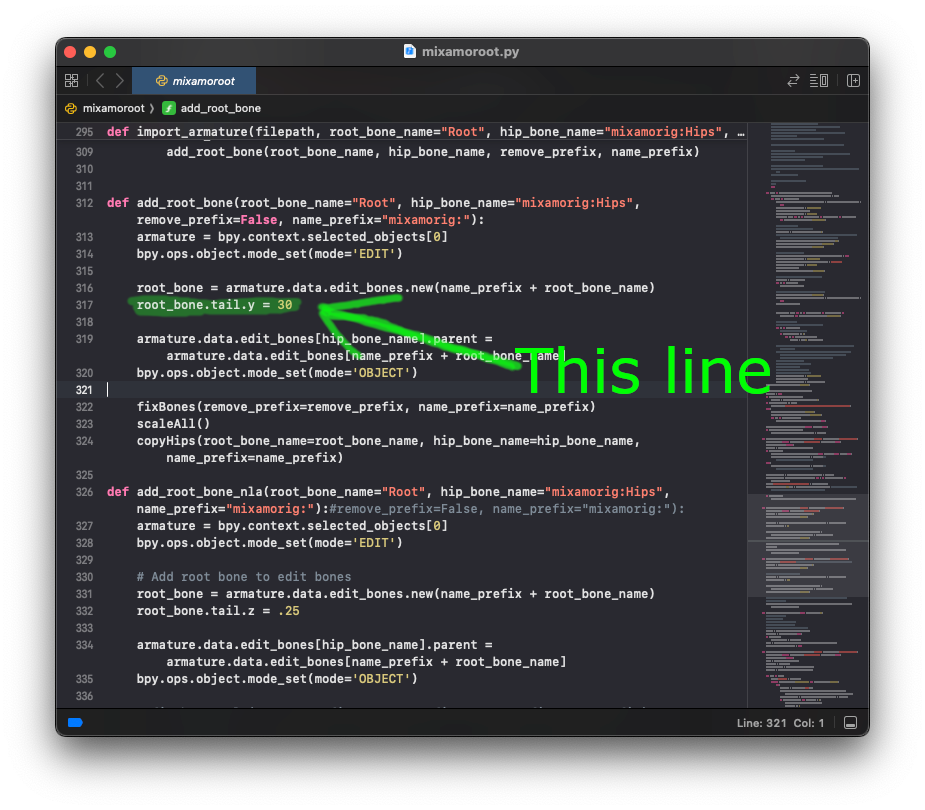
- Edit the Lines: Change this line to “root_bone.tail.y = 0.30”
- Save and Close: After making the necessary adjustments, save the changes and close the file.
- Re-zipping the Folder: Now, zip the folder with the modified files again.
- Importing the Plugin in Blender:
- Open Blender.
- Go to
Edit>Preferences. - In the Preferences window, click on the
Add-onstab. - Click on the
Install...button located at the top right corner. - Navigate to the directory where you saved the zipped file, select it, and click
Install Add-on. - Once installed, ensure to check the checkbox next to the plugin’s name to activate it.
By following these steps, you’ll rectify the discrepancy where the root bone appears excessively large, as described in our guide screenshot.
Using the Root Bone Plugin:
- Start Blender and remove everything by first pressing A (to select everything) and then X (to remove everything)
- Open the N-Panel by pressing the N key or by clicking on the small arrow on the right border
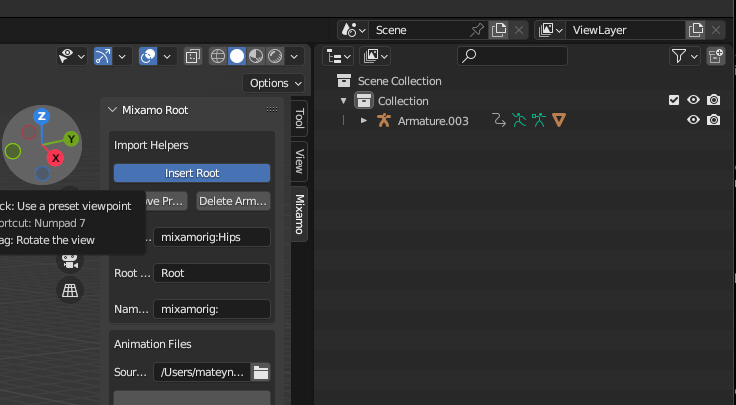
- Now select the Mixamo toolbox as shown in this screenshot
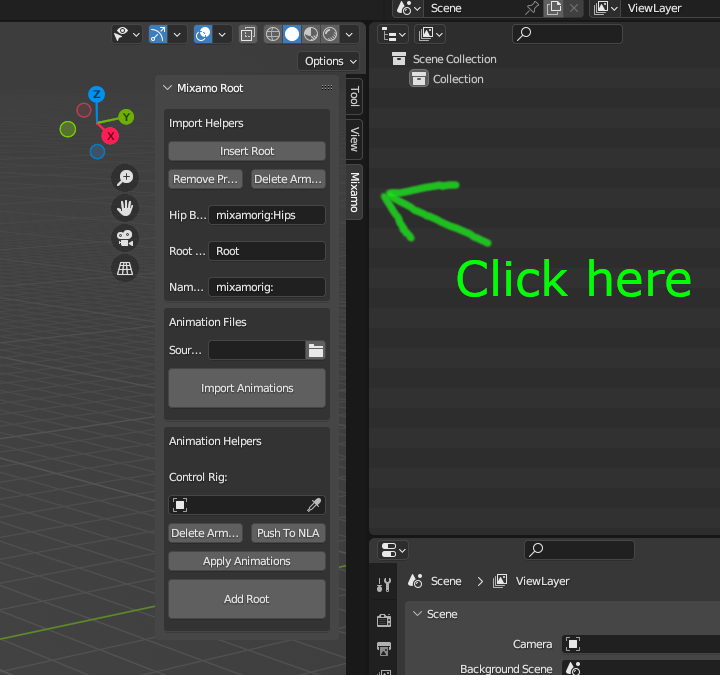
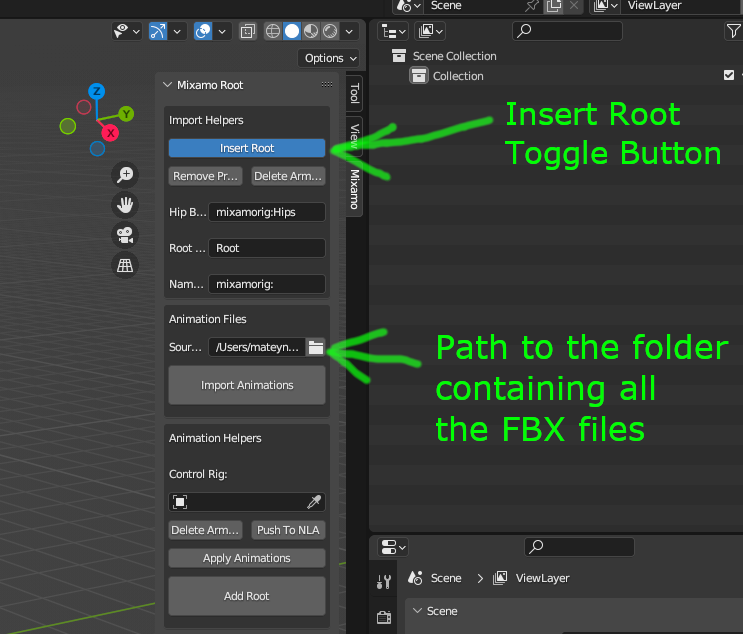
- Select the Insert Root toggle. The plugin also requires the directory path of all the FBX files you intend to incorporate. Finally hit the Import Animations button, and let the plugin do its magic (refer to the associated screenshot for clarity).
2. Preparing the Model:
Pruning Unwanted Armatures:
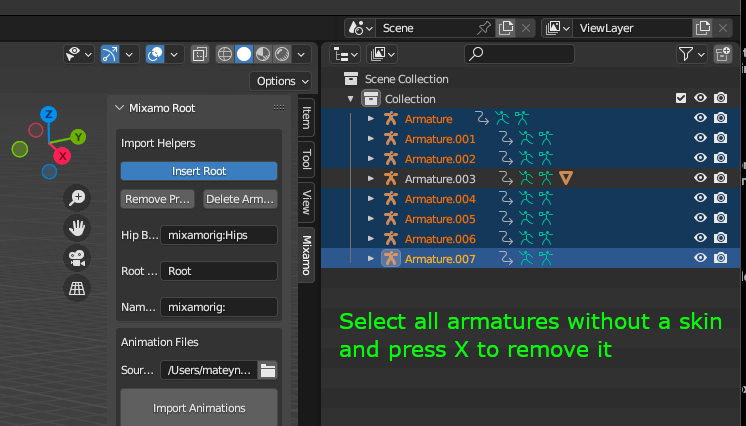
Now only the armature with the skin is left (the one with the triangle)
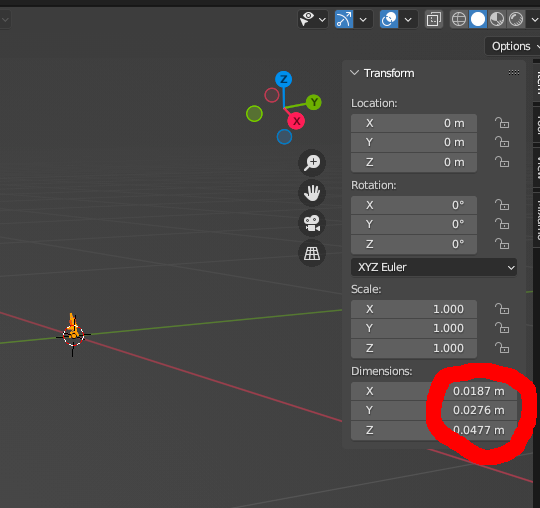
Scale the model:
Select the Armature either by clicking on it or by pressing the A key. Now press the S key to scale and type the needed scale factor (I’ll use 50 for this model). Finally hit Enter to scale the model.
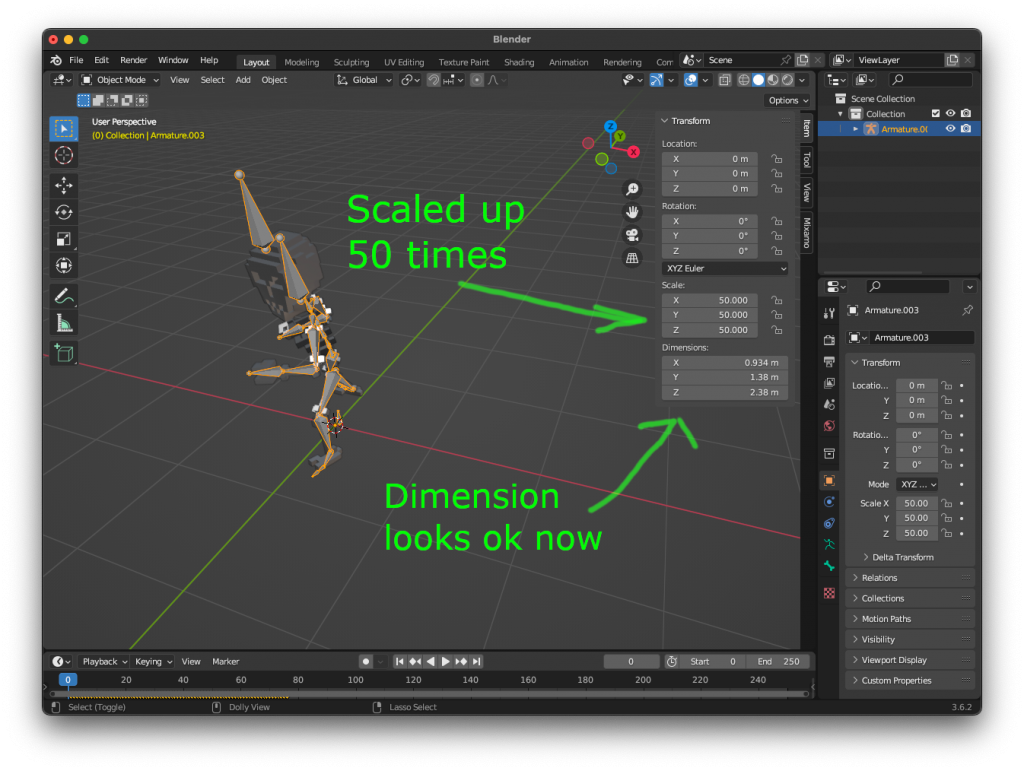
Now Apply the scale by either pressing Ctrl + A and then S or by choosing Object->Apply->Scale.
When you apply the scale, you may notice a slight change in the position of the model. This is because the scale wasn’t applied to the animations and from now on the animations are “borken”.
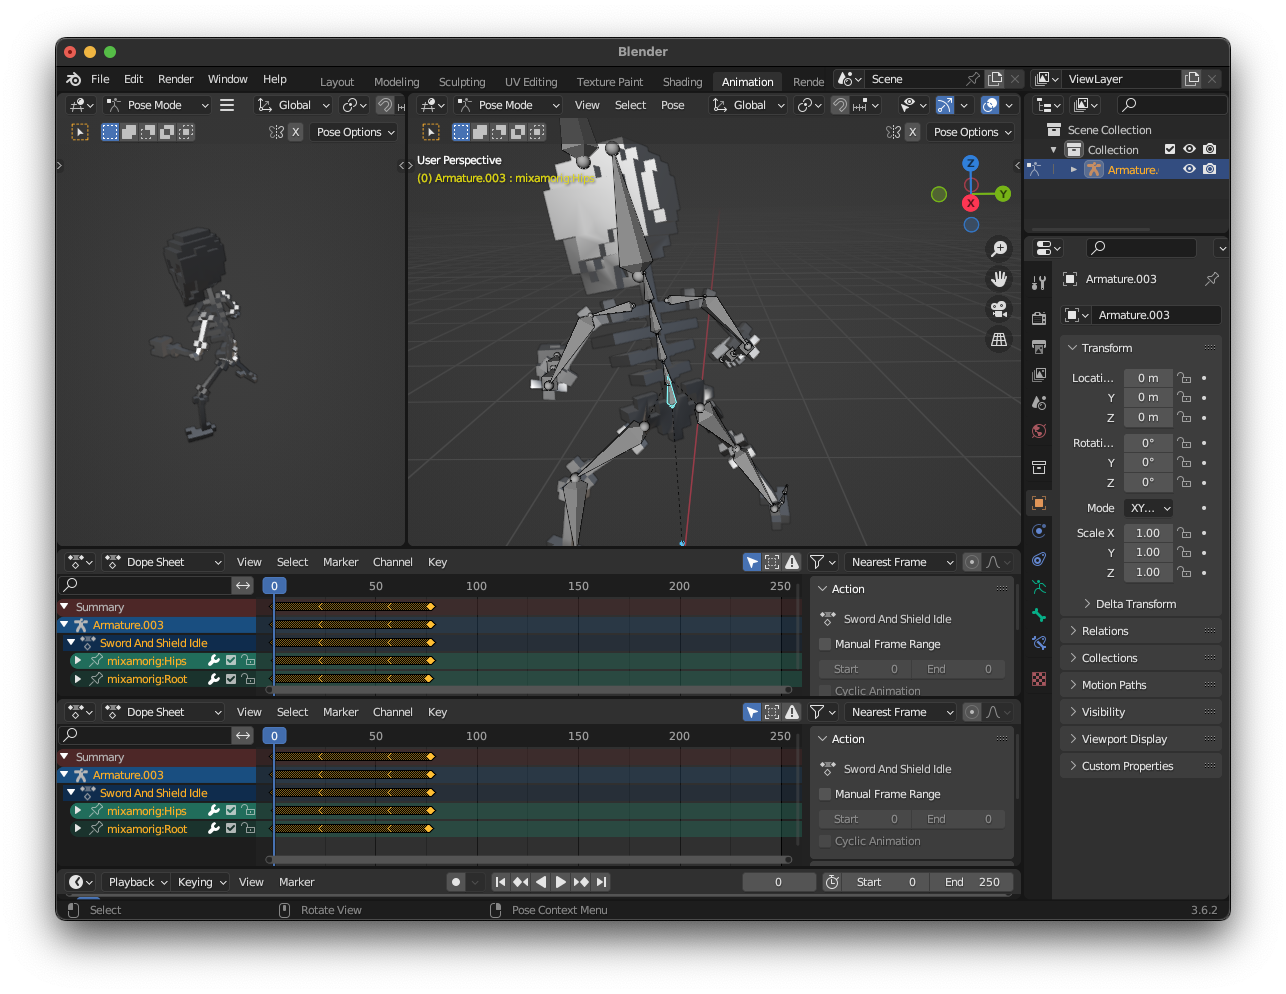
3. Rectifying the Animation:
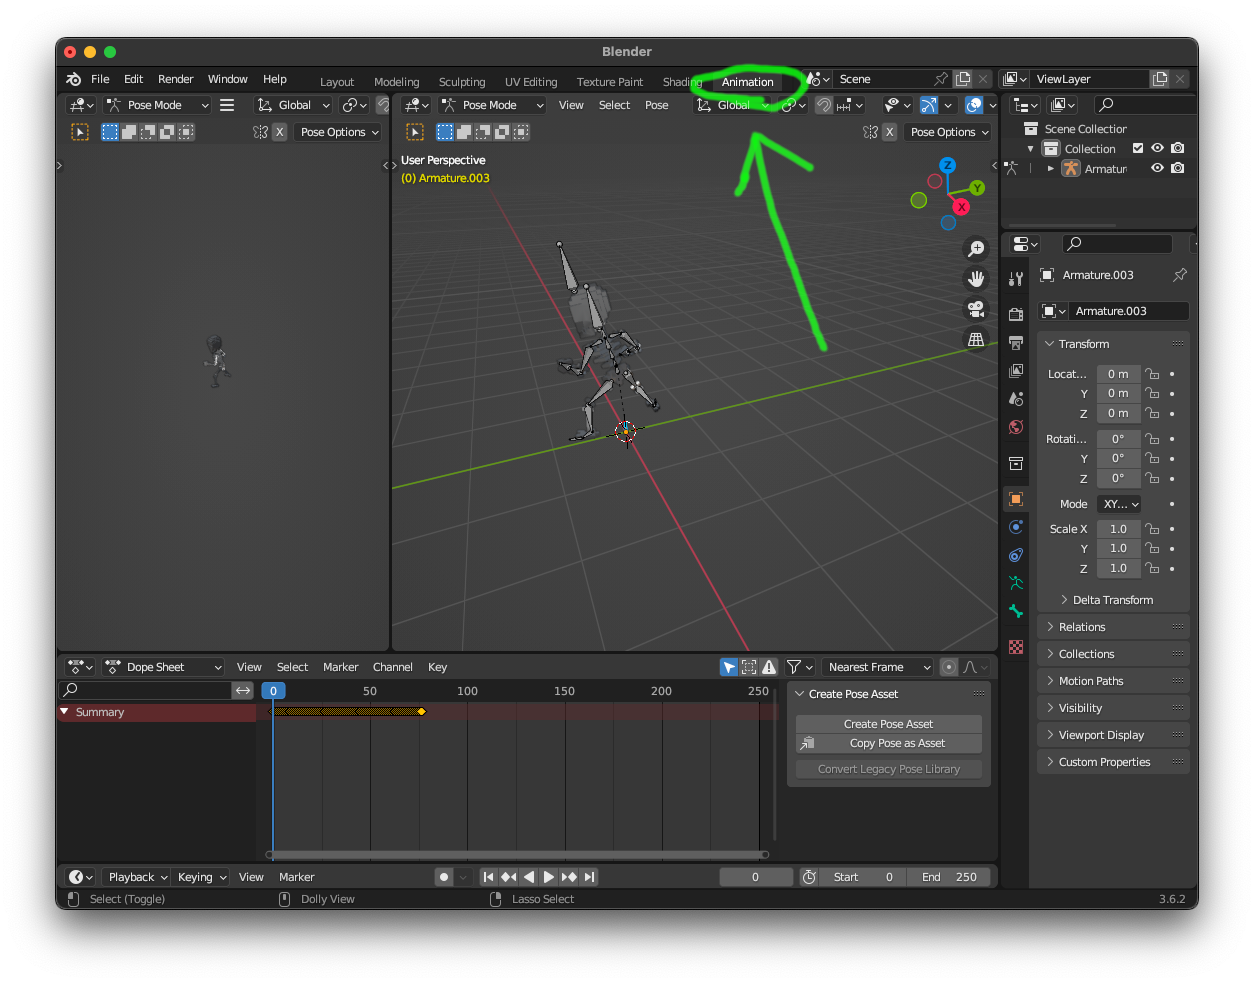
- Transition to Animation Window: First things first, switch to the animation view. A quick glance at the provided screenshot will get you on the right track.
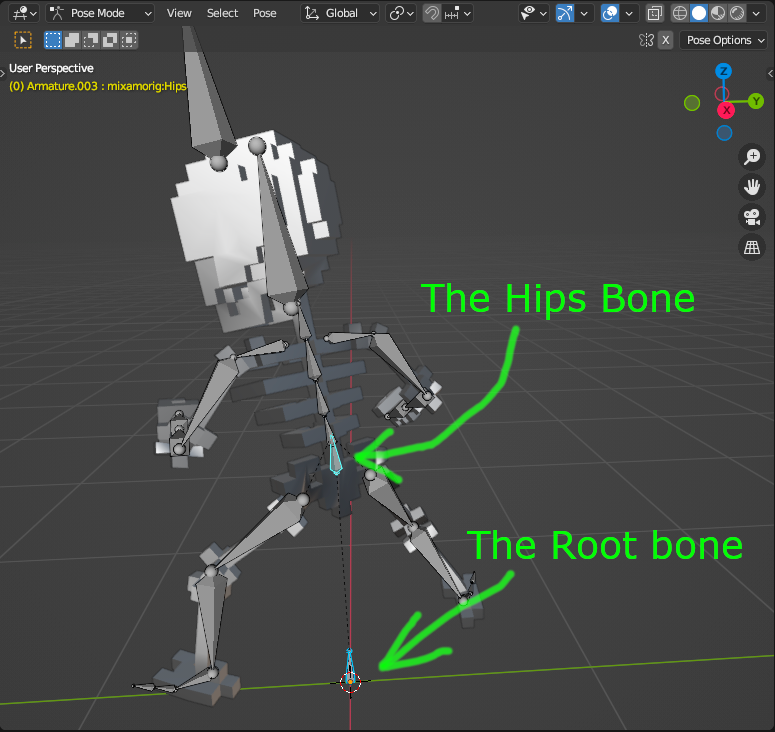
- Bone Selection: Our primary targets are the Root bone and the Hips bone. Click on the Hips bone first, then hold Shift and click on the Root bone. Use our screenshot for a hassle-free selection process.
- First, open a second Dope Sheet panel: Put the mouse on the top left corner of the Dope Sheet panel. The cursor will change to a cross. Now press the left mouse button and drag it downwards. In the end, Blender should look like this:
- Select the Action Editor in the first Dope Sheet panel: Click on the Dope Sheet dropdown and select Action Editor. Now you can change the Animations from the animations drop-down:

- Introduction to the Graph Editor: The graph editor is where the magic happens.
Click on the Editor Type dropdown and select the Graph Editor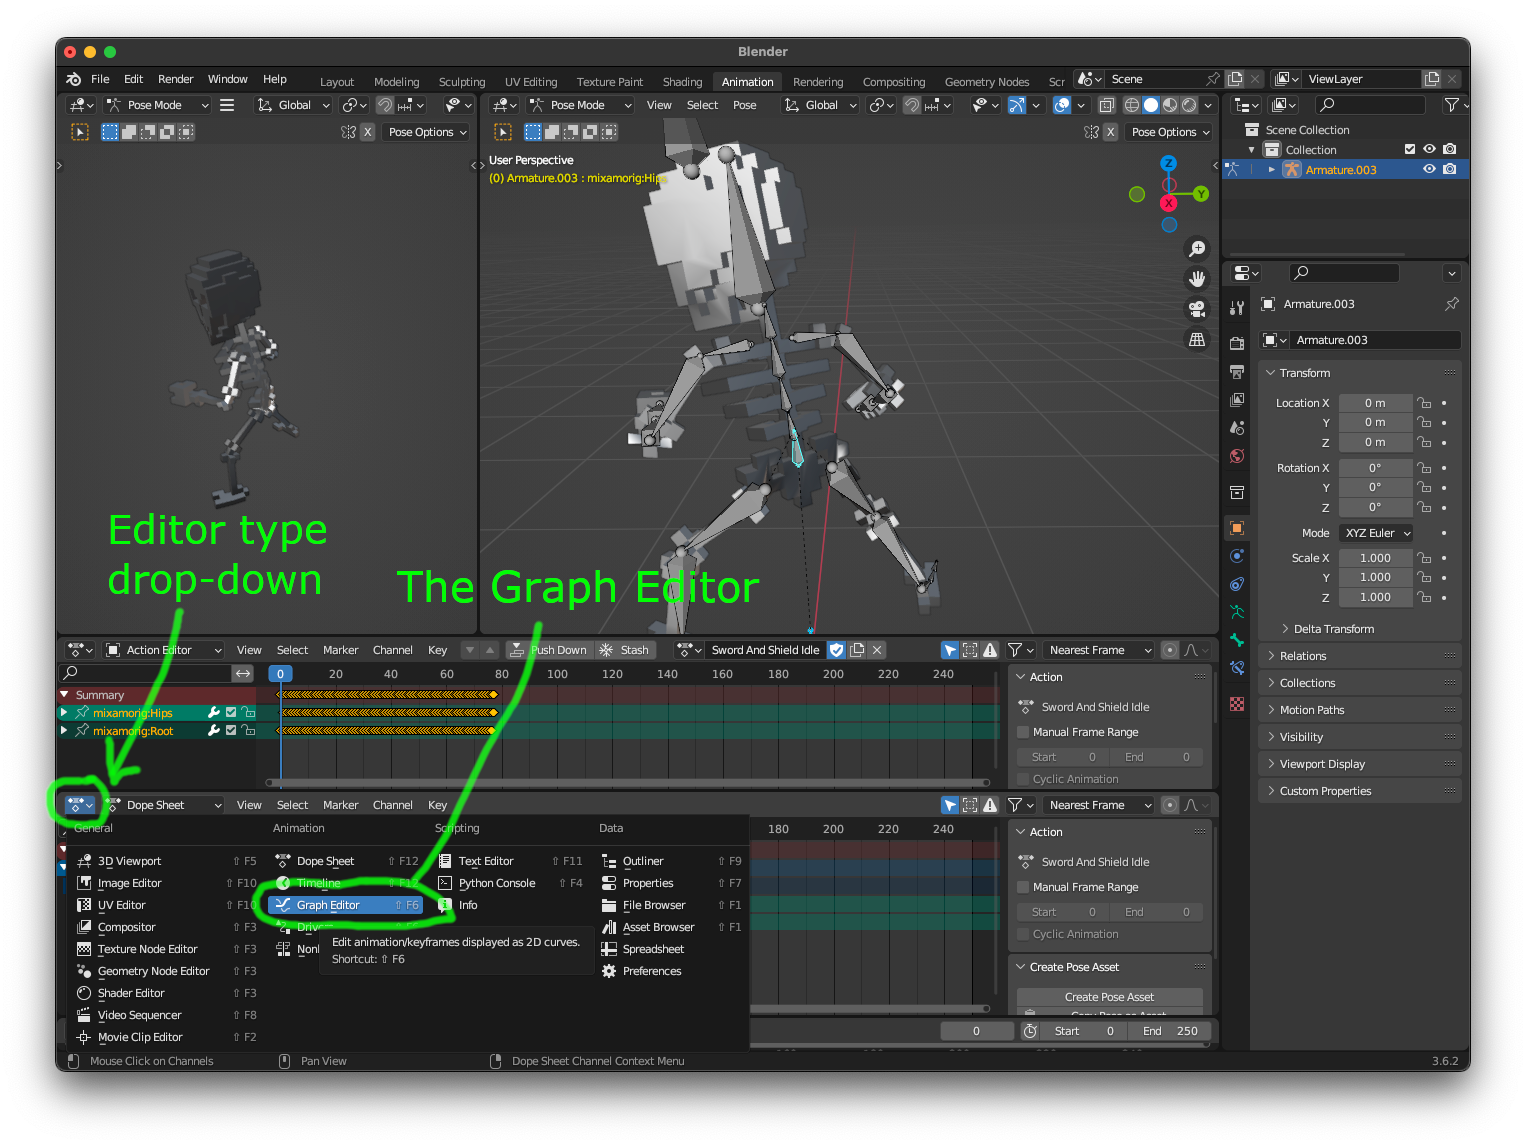
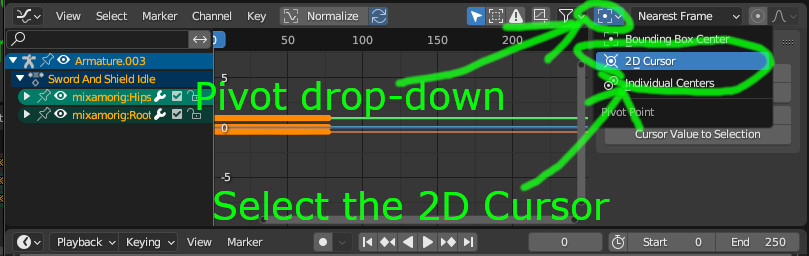
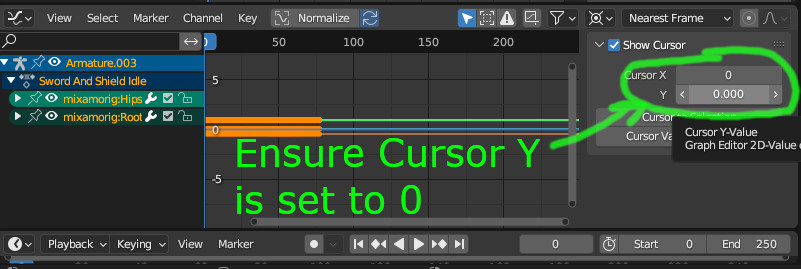
- Pivot Adjustments: Set the pivot to the cursor, ensuring its Y value is 0. Our visual guide captures this nuance perfectly.
- Identifying Transformations: Concentrate only on the location transformations, easily identifiable via our illustrative screenshot.
1. Select the animation you want to fix
2. Ensure that only the Location properties are visible
3. Ensure that all the keyframes are selected (press A to select all)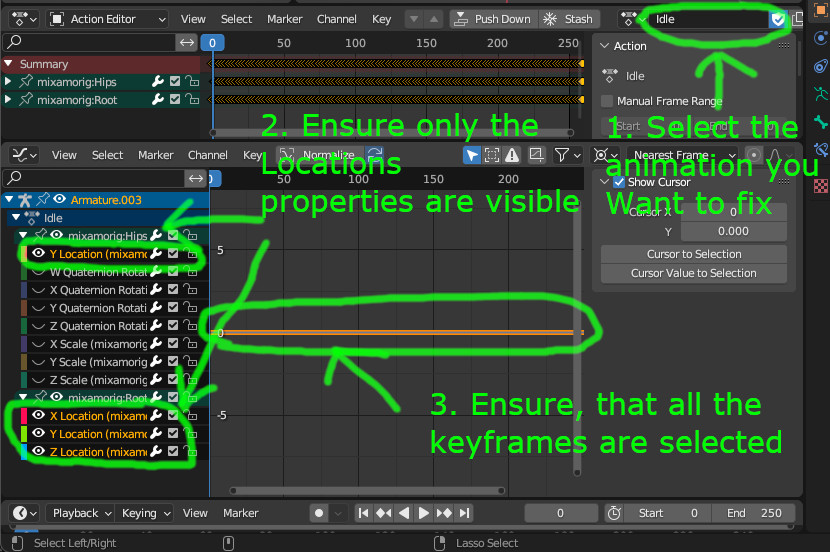
- Accurate Scaling: The final piece of the puzzle is scaling exclusively in the Y direction using the scaling factor you used when scaling the model (we used a scale factor of 50). The accompanying screenshot paints a clear picture.
With the mouse in the key-frames panel press S (for scale), then press Y (to scale only in the y directions, then type the scale factor (e.g. 50), and finally press Enter (or the left mouse button) to apply the scale.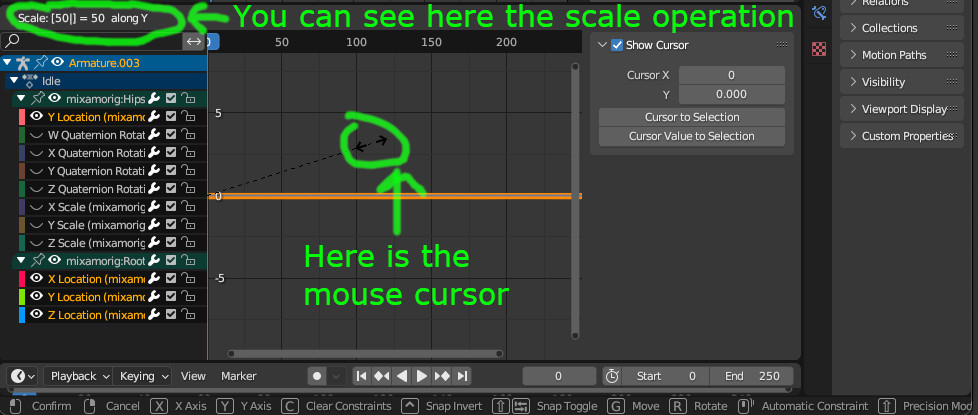
- Repeat the above steps for all the animations
In Conclusion:
This method serves as a reliable remedy not just for this specific issue but for a myriad of animation scaling problems in Blender. By understanding the intricacies and following the guide, the daunting task of fixing broken animations transforms into a straightforward process.
In the intricate dance of game development, sometimes it’s the technical nuances that take center stage. Here’s hoping this guide makes your Blender journey smoother. Stay tuned for more insights and keep blending!

Leave a Reply
You must be logged in to post a comment.