


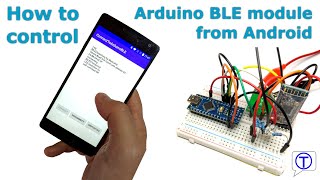
How to connect to and control an Arduino Nano with an AT-09 / HM-10 Bluetooth Low Energy (BLE) module from an Android device.
 Module AT-09 / HM-10 to Arduino Nano")
This tutorial is part of the BlueCArd tutorials series with the ultimate to build the BlueCArd Arduino-based RC car controlled from an Android phone through Bluetooth.
In the last tutorial, I showed you how to connect the Bluetooth module to the Arduino microcontroller and how to send data between the Arduino Nano and the BLE module.
In this tutorial, we will use the board and the source code from the last tutorial. You can find the previous tutorial here: BlueCArd – part 5 – Arduino Nano Bluetooth module how to (AT-09 or HM-10)
I also made a short overview video of all the steps I did to make this work. You can watch the video here:
Also, reuse the board from the last tutorial: BlueCArd – part 5 – Arduino Nano Bluetooth module how to (AT-09 or HM-10)
For this tutorial, You will need to have an Android device with developer mode switched on. You also need to have Android Studio installed and know how to build and run Apps on the Android device.
You can download the Android studio from here: https://developer.android.com/studio
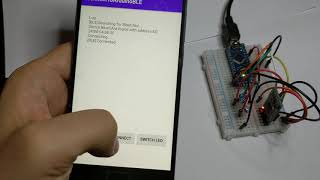
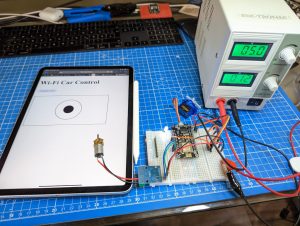
This is the Android App that we will build in this tutorial in action:
Create the Android Studio project
Start the Android Studio and create a new android project
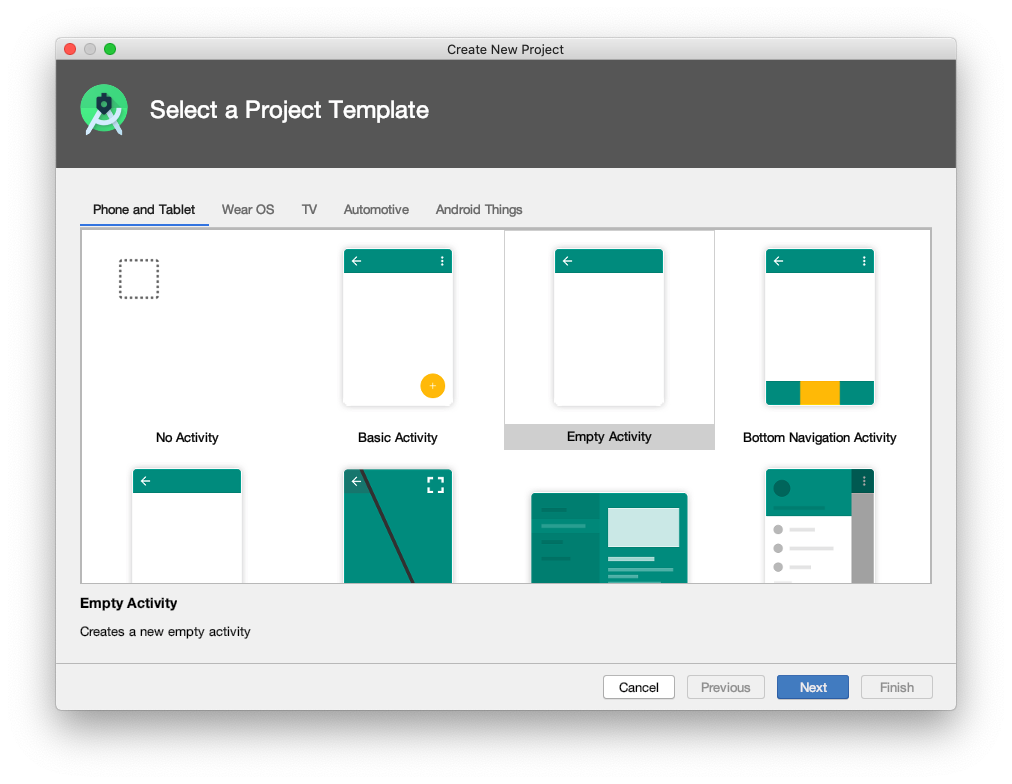
Choose the empty activity and click Next
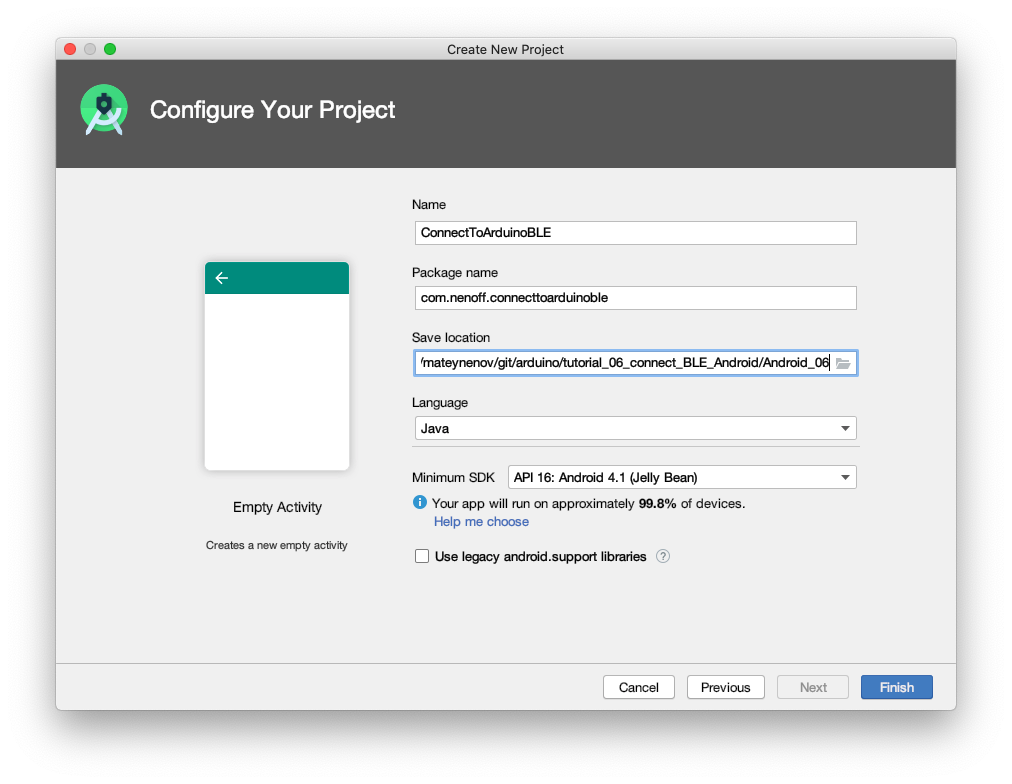
- Choose a name, package name, and location.
- For Language select Java.
- IMPORTANT – Minimum SDK should be at least 18!
Click Finish.
To be able to use Bluetooth and search for other Bluetooth devices we need to add some permission. To do this open the manifest file: app->manifests->AndroidManifest.xml
And add these permissions right before the “<application…” tag:
1 2 3 4 | <uses-permission android:name="android.permission.BLUETOOTH" /> <uses-permission android:name="android.permission.BLUETOOTH_ADMIN" /> <uses-permission android:name="android.permission.ACCESS_COARSE_LOCATION" /> <uses-permission android:name="android.permission.ACCESS_FINE_LOCATION" /> |
Fine location permission is needed to be able to search for other Bluetooth devices. Without this permission will be impossible to search for the Bluetooth module by name.
Create the UI
Now let’s create a simple UI. Open the activity_main.xml file:
app->src->main->res->layout->activity_main.xml
And try to create the following UI:
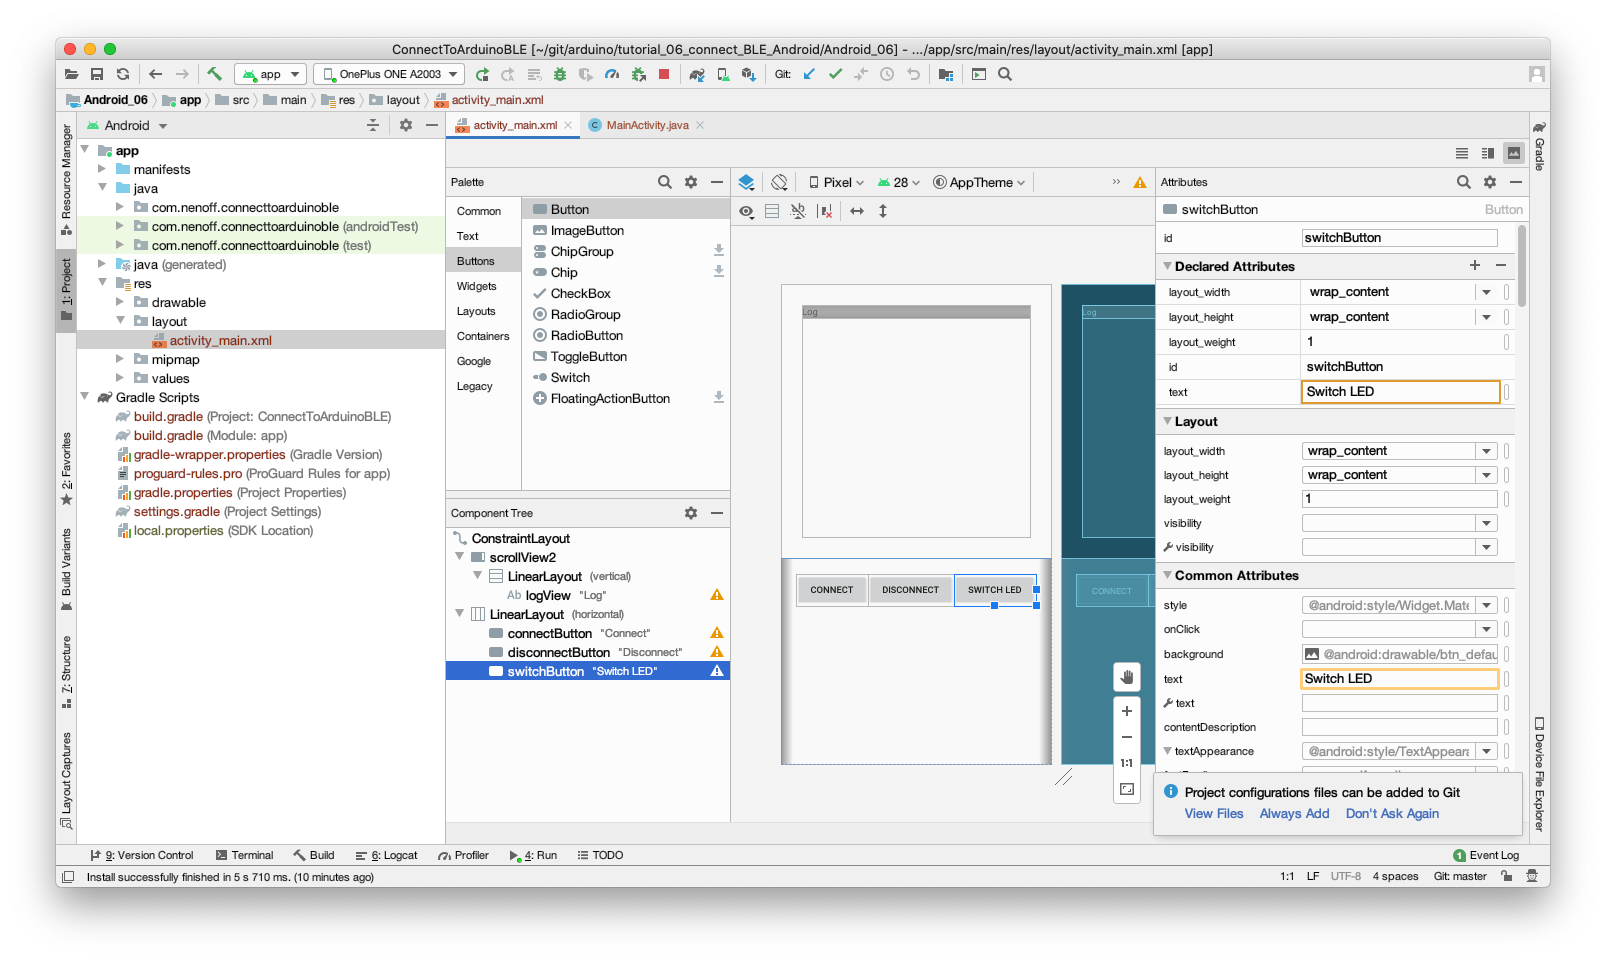
The layout is not very important. What is important is to have these elements in the UI:
- TextView element with id “logView“
- Button with id “connectButton” and text “Connect“
- Button with id “disconnectButton” and text “Disconnect“
- Button with id “switchButton” and text “Switch LED“
In the TextView, we will show some information. E.g. when the Bluetooth device is found, connected, disconnected, etc…
With this the UI is ready. Now let’s write some code!
An easy way to show information to the user
Open the main activity code app->java->”package name”->MainActivity
We will use the TextView component to show some information to the user.
Make a variable logView and init it in the onCreate() method:
1 | private TextView logView; |
and then init it in the onCreate() :
1 2 | this.logView = findViewById(R.id.logView); this.logView.setMovementMethod(new ScrollingMovementMethod()); |
Now we need a method to easily log data to the text view. Add this method to the MainActivity class:
1 2 3 4 5 6 7 8 | private void log(final String text) { runOnUiThread(new Runnable() { @Override public void run() { logView.setText(logView.getText() + "\n" + text); } }); } |
Executing the code in runOnUiTrhead(…) gives us the possibility to call this method from other threads except for the UI thread.
Now we can show the user what is happening. Let’s start with the Bluetooth stuff!
Check if the Android device is ready to use Bluetooth
- First, we have to check if the device can use Bluetooth. To do this we have to use the hasSystemFeature() method.
Add this method to the MainActivity class and call if in onCreate():
1 2 3 4 5 6 7 | private void checkBLESupport() { // Check if BLE is supported on the device. if (!getPackageManager().hasSystemFeature(PackageManager.FEATURE_BLUETOOTH_LE)) { Toast.makeText(this, "BLE not supported!", Toast.LENGTH_SHORT).show(); finish(); } } |
If Bluetooth is not supported we can’t do anything else, so just toast a message to the user and finish the activity (app).
- The next thing to check is if Bluetooth is enabled. For this add this method to the onStart(): method.
1 2 3 4 | if(!BluetoothAdapter.getDefaultAdapter().isEnabled()){ Intent enableBTIntent = new Intent(BluetoothAdapter.ACTION_REQUEST_ENABLE); startActivityForResult(enableBTIntent, 1); } |
We do this in the onStart() method because the user can disable Bluetooth at any time when the activity is paused.
Further, if the Bluetooth is disabled we just ask the user to enable it.
The last thing to check is if the user has granted the fine location permission and if not to ask him to do so.
Add this method to the MainActivity() and call it from onCreate() and onStart() methods.
In this way, if the user grants or declines the permission after the onCreate() call we can check it again in the onStart().
1 2 3 4 5 6 7 8 9 10 | private void checkPermissions() { if (ContextCompat.checkSelfPermission(this, Manifest.permission.ACCESS_FINE_LOCATION) != PackageManager.PERMISSION_GRANTED) { log("\"Access Fine Location\" permission not granted yet!"); log("Whitout this permission Blutooth devices cannot be searched!"); ActivityCompat.requestPermissions(this, new String[]{Manifest.permission.ACCESS_FINE_LOCATION}, 42); } } |
If the permission is not granted all we can do is to request it. We have no control over the dialog that is presented to the user.
With this, the Bluetooth preparations are finished. Now we know that:
- We have Bluetooth capabilities
- Bluetooth is enabled
- And we have all the permission needed to search for BLE devices and connect to them
Now let’s search for BLE devices
Finding and connecting to Bluetooth Low Energy devices
To have the code well organized I put all the Bluetooth code in a separate class. Also, later we will need to use the Bluetooth connection in another activity. The easiest way will be to make the BLE class a singleton.
Create a class named BLEController and make it a singleton. The getInstance() method needs a Context (needed for the system BluetoothManager).
1 2 3 4 5 6 7 8 9 10 11 12 13 14 15 16 | public class BLEController { private static BLEController instance; private BluetoothManager bluetoothManager; private BLEController(Context ctx) { this.bluetoothManager = (BluetoothManager) ctx.getSystemService(Context.BLUETOOTH_SERVICE); } public static BLEController getInstance(Context ctx) { if (null == instance) instance = new BLEController((ctx)); return instance; } } |
Now we have a BLEController singleton class with a BluetoothManager. The next step is to start the search for Bluetooth devices.
First, we need a list to save the devices we find (may be used later to choose multiple compatible devices):
1 | private HashMap<String, BluetoothDevice> devices = new HashMap<>(); |
The string key here will be the device’s MAC address.
Next, we need a BluetoothLeScanner object to scan for the available BLE devices:
1 | private BluetoothLeScanner scanner; |
Before we start scanning for BLE devices we have to take care of the communication between the BLEController class and the other parts of the App (e.g. the MainActivity). In particular, there are three events that are important for us:
- When a compatible Bluetooth LE device is found
- When connected to a BLE device
- When disconnected
BLEController shouldn’t care who needs the events, so the easiest way is to use listeners. To keep things simple, I created a listener with three methods for the three events.
1 2 3 4 5 | public interface BLEControllerListener { public void BLEControllerConnected(); public void BLEControllerDisconnected(); public void BLEDeviceFound(String name, String address); } |
Now we have to add functionality to the BLEController to add and remove a BLEControllerListener and also methods to fire the events:
1 2 3 4 5 6 7 8 9 10 11 12 13 14 15 16 17 18 19 20 21 22 23 24 25 26 27 28 29 | private BluetoothDevice device; private ArrayList<BLEControllerListener> listeners = new ArrayList<>(); public void addBLEControllerListener(BLEControllerListener l) { if(!this.listeners.contains(l)) this.listeners.add(l); } public void removeBLEControllerListener(BLEControllerListener l) { this.listeners.remove(l); } private void fireDisconnected() { for(BLEControllerListener l : this.listeners) l.BLEControllerDisconnected(); this.device = null; } private void fireConnected() { for(BLEControllerListener l : this.listeners) l.BLEControllerConnected(); } private void fireDeviceFound(BluetoothDevice device) { for(BLEControllerListener l : this.listeners) l.BLEDeviceFound(device.getName().trim(), device.getAddress()); } |
device is the currently connected device.
Now the interested classes can implement the BLEControllerListener interface and register themself for the events.
Now we can start scanning for BLE devices. First, we have to define a callback that will be called when a device is found or the scan failed.
When a device is found a callback function will be executed. Before we start scanning for BLE devices we need to define the callback function.
1 2 3 4 5 6 7 8 9 10 11 12 13 14 15 16 17 18 19 20 21 22 23 24 25 26 27 28 29 30 31 32 33 | private ScanCallback bleCallback = new ScanCallback() { @Override public void onScanResult(int callbackType, ScanResult result) { BluetoothDevice device = result.getDevice(); if(!devices.containsKey(device.getAddress()) && isThisTheDevice(device)) { deviceFound(device); } } @Override public void onBatchScanResults(List<ScanResult> results) { for(ScanResult sr : results) { BluetoothDevice device = sr.getDevice(); if(!devices.containsKey(device.getAddress()) && isThisTheDevice(device)) { deviceFound(device); } } } @Override public void onScanFailed(int errorCode) { Log.i("[BLE]", "scan failed with errorcode: " + errorCode); } }; private boolean isThisTheDevice(BluetoothDevice device) { return null != device.getName() && device.getName().startsWith("BlueCArd"); } private void deviceFound(BluetoothDevice device) { this.devices.put(device.getAddress(), device); fireDeviceFound(device); } |
When a Bluetooth device is found we have to check if this is a device, we recognize. In the previous tutorial, we set the device name to “BlueCArd” so now we can look for devices with this name -> device.getName().startsWith(“BlueCArd“)
When a compatible device is found we put it in the device’s map and fire a device found event.
Before we write the code to respond to this event, we need one more thing. An initialization method to start the scan:
1 2 3 4 5 | public void init() { this.devices.clear(); this.scanner = this.bluetoothManager.getAdapter().getBluetoothLeScanner(); scanner.startScan(bleCallback); } |
Now let’s integrate the BLEController in the MainActivity class.
First, let’s implement the BLEControllerListener and implement the three methods:
1 2 3 4 5 6 7 8 9 10 11 12 13 14 15 16 17 18 19 | public class MainActivity extends AppCompatActivity implements BLEControllerListener { ... @Override public void BLEControllerConnected() { log("[BLE]\tConnected"); } @Override public void BLEControllerDisconnected() { log("[BLE]\tDisconnected"); } @Override public void BLEDeviceFound(String name, String address) { log("Device " + name + " found with address " + address); } } |
Create a BLEController variable:
1 | private BLEController bleController; |
and initialize it in the onCreate() method:
1 | this.bleController = BLEController.getInstance(this); |
Add the MainActivity as a listener in the onResume() method and start the scan (if we have the needed permissions to search for BLE devices):
1 2 3 4 5 6 | this.bleController.addBLEControllerListener(this); if (ContextCompat.checkSelfPermission(this, Manifest.permission.ACCESS_FINE_LOCATION) == PackageManager.PERMISSION_GRANTED) { log("[BLE]\tSearching for BlueCArd..."); this.bleController.init(); } |
The last thing to do is to remove the listener in onPause():
1 | this.bleController.removeBLEControllerListener(this); |
Now we can test the App.
- Connect the Arduino Nano circuit from the last tutorial to the computer
- Build and run the App on an Android device
When the App starts on your device it should find the BLE module and show the address in the TextView.
Connect to the Bluetooth BLE module
First, we have to add a connectToDevice(String address) method to the BLEController class:
1 2 3 4 5 | public void connectToDevice(String address) { this.device = this.devices.get(address); this.scanner.stopScan(this.bleCallback); this.bluetoothGatt = device.connectGatt(null, false, this.bleConnectCallback); } |
First, we stop the scanner (we obviously found a suitable device already).
Then we can start the connection process. As usual, the connectGatt() method expects a callback.
1 2 3 4 5 6 7 8 9 10 11 12 13 14 15 16 17 18 19 20 21 22 23 24 25 26 27 28 29 30 31 | private final BluetoothGattCallback bleConnectCallback = new BluetoothGattCallback() { @Override public void onConnectionStateChange(BluetoothGatt gatt, int status, int newState) { if (newState == BluetoothProfile.STATE_CONNECTED) { bluetoothGatt.discoverServices(); }else if (newState == BluetoothProfile.STATE_DISCONNECTED) { btGattChar = null; fireDisconnected(); } } @Override public void onServicesDiscovered(BluetoothGatt gatt, int status) { if(null == btGattChar) { for (BluetoothGattService service : gatt.getServices()) { if (service.getUuid().toString().toUpperCase().startsWith("0000FFE0")) { List<BluetoothGattCharacteristic> gattCharacteristics = service.getCharacteristics(); for (BluetoothGattCharacteristic bgc : gattCharacteristics) { if (bgc.getUuid().toString().toUpperCase().startsWith("0000FFE1")) { int chprop = bgc.getProperties(); if (((chprop & BluetoothGattCharacteristic.PROPERTY_WRITE) | (chprop & BluetoothGattCharacteristic.PROPERTY_WRITE_NO_RESPONSE)) > 0) { btGattChar = bgc; fireConnected(); } } } } } } } }; |
The callback has two methods.
onConnectionStateChange(…) is called when the connection state is changed (connected / disconnected / whatever).
When the state is connected we start the discoverServices() right away. BLE uses services and we have to find the right one (we have set up the right one in the previous tutorial)
When the state is disconnected, we just fire a disconnected event, so the listeners can show the appropriate state (e.g. show connect button again and disable remote functionality)
onServicesDiscovered(…) is called when a service is discovered (for the device we called discoverServices() on).
Here we have to find the right service that we configured in the previous tutorial. We are looking for a service with UUID that starts with “0000FFE0” and Characteristic UUID that starts with “0000FFE1“.
When we find the right BluetoothGattCharacteristic we have to store it in a local variable. We will need it to send data to the Bluetooth device later.
One last thing we need is a way to disconnect from the BLE device. For this add this method:
1 2 3 | public void disconnect() { this.bluetoothGatt.disconnect(); } |
With this, the connection is established and we can fire the connected event.
Now we can use this functionality from the MainActivity.
First, we need to initialize the Connect and Disconnect buttons:
1 2 3 4 5 6 7 8 9 10 11 12 13 14 15 16 17 18 19 20 21 22 23 | private void initConnectButton() { this.connectButton = findViewById(R.id.connectButton); this.connectButton.setOnClickListener(new View.OnClickListener() { @Override public void onClick(View v) { connectButton.setEnabled(false); log("Connecting..."); bleController.connectToDevice(deviceAddress); } }); } private void initDisconnectButton() { this.disconnectButton = findViewById(R.id.disconnectButton); this.disconnectButton.setOnClickListener(new View.OnClickListener() { @Override public void onClick(View v) { disconnectButton.setEnabled(false); log("Disconnecting..."); bleController.disconnect(); } }); } |
These two methods are pretty straight forward and the buttons just use the corresponding methods in the BLEController class.
Now call these methods in the onCreate() method. Also, don’t forget to disable the buttons in onCreate().
The last thing to do is to enable/disable the buttons in the connect and disconnect callbacks from the BLEController.
In BLEControllerConnected() disable the Connect button and enable the Disconnect button.
in BLEControllerDisconnected() enable the Connect button and disable the Disconnect button.
Warning: these methods are not called from the UI thread, so you have to use runOnUiThread(…) e.g.:
1 2 3 4 5 6 | runOnUiThread(new Runnable() { @Override public void run() { connectButton.setEnabled(true); } }); |
Now build and run the App. After the Bluetooth device is found the Connect button should be enabled.
When you click it the Android App should connect to the Arduino Nano BLE module and:
- The Connect button should be disabled again
- The Disconnect button should be enabled again
- The connection LED on the BLE module should be on (no blinking)
Send data to the Arduino Nano microcontroller (Arduino Side)
To send the data we will the following command format:
byte 0: START (0x1)
byte 1: Command
byte 2: Num of parameters
byte 2+n for n > 0: The nth parametern
This may look like overkill for a simple led switch, but it is a good structure to send different commands. We will use it in the next tutorials to control the engine and the steering (servo motor) of the BlueCArd RC car.
First, we have to modify the Arduino sketch.
Create a new file called controller.ino. In this file, we will put all the parse and controller logic.
1 2 3 4 5 6 7 8 9 10 11 12 13 14 15 16 17 18 19 20 21 22 23 24 25 26 27 | const int SWITCH_LED = 0x4; const int lightsPin = 9; const initController() { pinMode(lightsPin, OUTPUT); } void executeCommand(int cmd[]) { switch(cmd[1]) { case SWITCH_LED: switchLight(cmd[3]); break; } } void switchLight(int v) { if(v == 0) { Serial.println("Switch the linght off"); }else { Serial.println("Switch the linght on"); } switchLED(v); } void switchLED(int value) { analogWrite(lightsPin, value); } |
SWITCH_LED is the command for the LED control.
We connected the LED to pin D9. In the initController() we set the D9 as an OUTPUT.
The executeCommand() function becomes an int array with the command structure we described above.
The switchLight() function sets the LED to the given value. With this, we could also change the LED intensity.
The initController() function should be executed only once on start. We can call this function from the setup() function.
What is left is to read the command in the bluetooth.ino file.
First, add this constant to the Bluetooth file:
1 | const int START_COMMAND = 0x1; |
We also need an int array to read the command into and a variable for the current position in this array:
1 2 | int buff[10]; int currPos = 0; |
Add also these methods at the end of the file:
1 2 3 4 5 6 7 8 9 10 11 12 13 14 15 16 17 18 19 20 | void readCommand() { while (mySerial.available()) { int nc = mySerial.read(); if (currPos > 0 || nc == START_COMMAND) parseNext(nc); } } void parseNext(int next) { buff[currPos++] = next; if (isCommandFullyRead()) { executeCommand(buff); currPos = 0; } } bool isCommandFullyRead() { return currPos > 2 && // command header is 3 bytes (START, Command type, num of parameters) buff[2] == currPos - 3; // are all parameters already read } |
This code reads the data from the BLE module and checks if it is a command (START_COMMAND). If so, it reads the whole command and when finished sends it to the controller.
Now in the loop() function remove updateSerial() and add readCommand() instead.
With this, the Arduino part is finished.
Send data to the Arduino Nano microcontroller (Android Side)
First, we have to add a method to send data to the BLE module in the BLEController class:
1 2 3 4 | public void sendData(byte [] data) { this.btGattChar.setValue(data); bluetoothGatt.writeCharacteristic(this.btGattChar); } |
Now we can use this method to send data. Create a new class RemoteControl and add this code to it:
1 2 3 4 5 6 7 8 9 10 11 12 13 14 15 16 17 18 19 20 21 22 23 24 25 26 27 28 | public class RemoteControl { private final static byte START = 0x1; private final static byte LED_COMMAND = 0x4; private final static byte VALUE_OFF = 0x0; private final static byte VALUE_ON = (byte)0xFF; private BLEController bleController; public RemoteControl(BLEController bleController) { this.bleController = bleController; } private byte [] createControlWord(byte type, byte ... args) { byte [] command = new byte[args.length + 3]; command[0] = START; command[1] = type; command[2] = (byte)args.length; for(int i=0; i<args.length; i++) command[i+3] = args[i]; return command; } public void switchLED(boolean on) { this.bleController.sendData(createControlWord(LED_COMMAND, on?VALUE_ON:VALUE_OFF)); } } |
This class uses the BLEController to send data to the Arduino microcontroller.
The createControlWord() method creates a byte array command for the given command type and parameters.
For now, we can send only one command. For more convenient use I added the switchLED() method.
Now in the MainActivity class add a remoteController variable and initialize it in the onCreate() method.
Also, add this method to initialize the switch LED button:
1 2 3 4 5 6 7 8 9 10 | private void initSwitchLEDButton() { this.switchLEDButton = findViewById(R.id.switchButton); this.switchLEDButton.setOnClickListener(new View.OnClickListener() { @Override public void onClick(View v) { isLEDOn = !isLEDOn; remoteControl.switchLED(isLEDOn); } }); } |
Call this method in the onCreate() after the calls for the other two buttons. Also disable the button in onCreate() and BLEControllerDisconnected() and enable it in BLEControllerConnected()
With this, the LED remote control is finished.
Now upload the sketch to the Arduino Nano microcontroller and build and run the Android App.
With this, the Android part of the Bluetooth setup is completed. You can find the source code for this tutorial on GitHub here:
https://github.com/nenovmy/arduino
in the “tutorial_06_connect_BLE_Android” folder.
Next Steps
In the next tutorial, I’ll show you how to connect a DC motor to an Arduino Nano microcontroller using an H-Bridge and how to control it remotely (RC) from an Android device.
Previous: BlueCArd part 5 – Arduino Bluetooth module how to (AT-09 or HM-10)
Next: BlueCArd part 7 – Using H-Bridge to control a DC Motor from Arduino Nano


Leave a Reply
You must be logged in to post a comment.